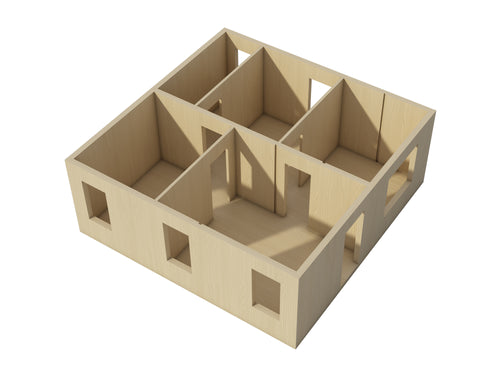
Have you ever dreamed of creating a miniature world filled with endless possibilities? Building DIY wooden dollhouses offers a rewarding and creative outlet for both children and adults alike. Whether you're a seasoned woodworker or a beginner just starting out, this guide will provide you with everything you need to bring your dollhouse vision to life.
Choosing the Right Materials: Wood, Tools, and Supplies
The foundation of your DIY wooden dollhouses lies in the materials you select. The right wood will not only provide structural integrity but also influence the overall aesthetic of your project. Consider these factors when choosing your wood:
- Type of wood: Softwoods like pine or cedar are popular choices for dollhouses due to their affordability and ease of working with. However, if you prefer a more durable and luxurious finish, hardwoods such as maple or cherry can be used.
- Thickness: The thickness of the wood will depend on the size and design of your dollhouse. Thinner wood can be used for walls and ceilings, while thicker wood may be required for floors and structural elements.
- Quality: Opt for high-quality wood with minimal knots or defects to ensure a smooth and even finish.
In addition to wood, you'll need a variety of tools and supplies to complete your dollhouse. Here are some essentials to consider:
- Measuring tools: A ruler, tape measure, and square are essential for accurate measurements.
- Cutting tools: A saw (e.g., circular saw, jigsaw) is necessary for cutting wood to size.
- Joining tools: Wood glue, nails, and screws are used to connect the various components of your dollhouse.
- Finishing tools: Sandpaper, paint, and varnish are used to smooth surfaces and add a finishing touch to your dollhouse.
Other supplies you may need include:
- Cardboard: For creating templates and patterns.
- Foam board: For insulation and support.
- Dowels: For creating furniture and decorative elements.
- Hardware: Hinges, knobs, and locks for doors and windows.
By carefully selecting your wood, tools, and supplies, you'll be well-equipped to embark on your DIY dollhouse adventure.
Designing Dream Dollhouses: Floor Plans and Features
Once you've gathered your materials, it's time to design dream dollhouses. This is where you can let your creativity shine and create a unique and personalized space. Here are some key elements to consider when designing your dollhouse:
- Floor plan: Determine the size and layout of your dollhouse. Consider the number of rooms, the arrangement of furniture, and the overall flow of the space.
- Exterior design: Choose a style for your dollhouse, such as Victorian, cottage, or modern. Consider the shape, size, and details of the roof, windows, and doors.
- Interior design: Plan the interior layout and decor. Consider the color scheme, furniture placement, and accessories.
- Features: Decide on any special features you want to include, such as balconies, porches, or a garage.
To help visualize your design, create a detailed floor plan and elevation drawings. You can also use online design tools or sketch out your ideas on paper.
When designing your dollhouse, keep in mind the scale you want to achieve. This will determine the size of furniture, accessories, and other details.
Consider the age and interests of the intended occupants of your dollhouse. A dollhouse for a young child may have a different design than one for a collector.
Don't be afraid to experiment and have fun with your design. The goal is to create a dollhouse that reflects your personal style and brings joy to those who play with it.
Building Your Dollhouses: Step-by-Step Instructions
Now that you have your design and materials ready, it's time to start building your dollhouse. Here are some step-by-step instructions to guide you through the process:
- Cut the wood: Using your measurements and design plans, cut the wood to size for the walls, floor, roof, and other structural components.
- Assemble the frame: Connect the walls, floor, and roof using wood glue, nails, and screws.
- Add interior details: Install the floors, ceilings, and any interior walls or partitions.
- Create windows and doors: Cut openings for windows and doors, and install them using hinges and hardware.
- Add exterior details: Install siding, trim, and any other exterior features such as porches or balconies.
- Paint and finish: Paint or stain your dollhouse to your desired color. Add any finishing touches such as decals or weatherproofing.
- Create furniture and accessories: Design and build furniture or purchase pre-made pieces. Add accessories such as curtains, rugs, and lighting.
As you build your dollhouse, take your time and pay attention to detail. If you encounter any challenges, don't be afraid to consult online tutorials or seek advice from experienced woodworkers.
Remember, building a DIY wooden dollhouse is a rewarding and enjoyable experience. Take pride in your craftsmanship and enjoy the satisfaction of creating something truly unique and special.
Final Thoughts
Building a DIY wooden dollhouse is a fulfilling and creative endeavor that can bring joy to both the builder and those who play with it. By carefully selecting your materials, designing your dream dollhouse, and following the step-by-step instructions, you can create a truly unique and personalized miniature world.
Remember, the most important thing is to have fun and enjoy the process. Don't be afraid to experiment and let your creativity shine. With a little patience and perseverance, you can build a dollhouse that will be cherished for years to come.

